Export or back up the relevant data first. Do not delete, void, unreconcile, or adjust historical transactions unless you understand the accounting impact.
Menu names can change. We link current first-party instructions so you can confirm product behavior before acting.
Quick answer
In QuickBooks Online, go to All apps → Accounting → Reconcile, choose the bank or credit card account, confirm the prior statement ending date, then enter the current statement's ending balance and ending date. Match only the transactions that appear on that statement. Finish when the difference is exactly $0.00.
If the difference is not zero, do not force it with an adjustment. First verify the statement information, then look for transactions that are missing, duplicated, posted to the wrong account, grouped differently by the bank, or cleared outside the statement period.
The three balances are different things
- Beginning balance: the reconciled ending balance from the prior period.
- Statement ending balance: the balance printed by the bank for this statement.
- QuickBooks balance: the register balance, including transactions that may not have cleared yet.
Before you start
Gather evidence before selecting anything. This is faster than trying to reconstruct a reconciliation after the fact.
- The complete bank or credit card statement for one account and one statement period.
- The exact statement ending date and ending balance.
- All transactions for that period entered, matched, categorized, or intentionally excluded.
- Any deposit detail that explains why several customer payments appear as one bank deposit.
- Access to the audit log or an accountant if a prior reconciliation changed unexpectedly.
Reconcile accounts in chronological order. If March has never been reconciled, do not start with April. A missing period makes the next beginning balance harder to interpret.
Workflow map
The reconciliation control loop
A zero difference is meaningful only when the opening point, statement period, and cleared activity are all correct.
- 1
Anchor
Confirm the real bank account, prior reconciliation, statement start, and beginning balance.
Evidence: Beginning balance agrees before checking current items.
- 2
Compare
Use the statement ending date and balance, then clear only statement-supported activity.
Evidence: Dates, amounts, and transaction types match.
- 3
Investigate
Trace missing, duplicated, changed, deleted, or wrongly dated items instead of forcing the difference.
Evidence: Each exception has source evidence.
- 4
Preserve
Finish at zero, save the report, and restrict later changes to the closed period.
Evidence: Report and bank statement are retained together.
Reconcile a bank or credit card account step by step
- Open Reconcile. Go to All apps → Accounting → Reconcile. Select Reconcile or Get started if this is the first time.
- Select the correct account. Check both the account name and the last four digits. Similar account names are a common source of unexplained differences.
- Review the last statement ending date. The current statement should normally begin the following day. Stop if the prior period is missing or the date is unexpected.
- Enter the ending balance and ending date. Copy them from the statement, not from the bank's live website balance. A live balance may include activity after the statement closed.
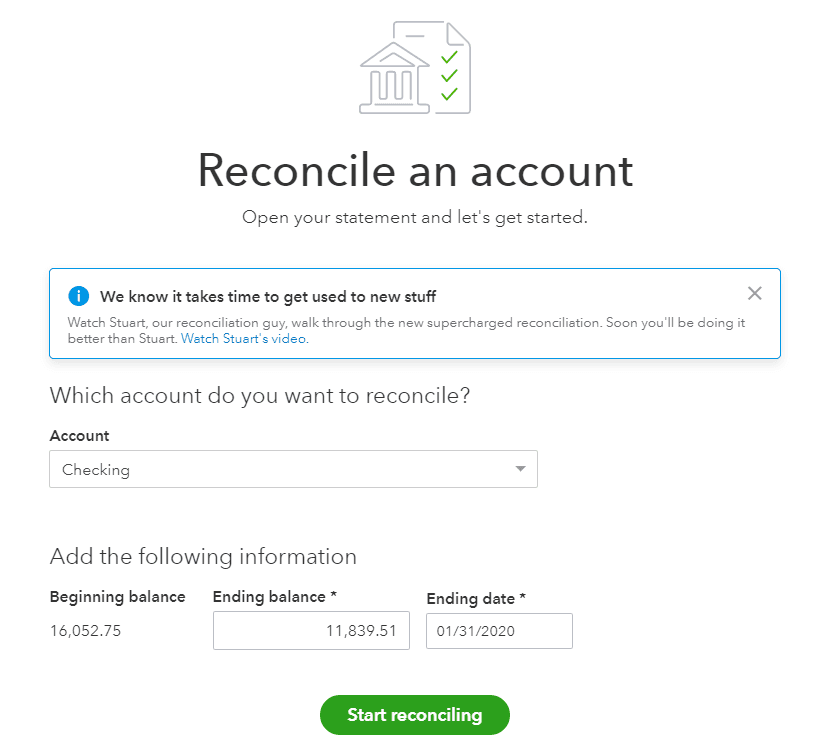
- 1Beginning balance is displayed, not entered. It comes from the last completed reconciliation, so if it disagrees with the statement opening figure, stop here — a previously reconciled transaction has been changed.
- 2Ending balance takes the closing figure from the statement exactly as issued, including sign and decimals. This is the only number on this screen you are asserting, and every later comparison rests on it.
- 3Ending date takes the statement’s own closing date. Do not default to calendar month-end: a statement that runs to the 27th and a reconciliation run to the 31st will disagree by whatever falls in the gap.
- Start reconciling. QuickBooks displays transactions in the account register. Filter out anything after the statement ending date.
- Check each statement transaction. Select the corresponding QuickBooks transaction only when the amount and real-world event match. The posting date may differ by a few days; the amount and transaction identity matter more.
- Watch the difference. Continue until every statement item is represented and the difference reaches $0.00.
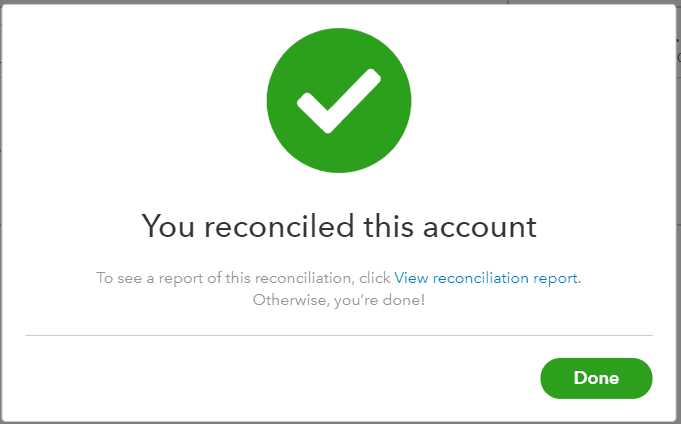
- Finish and save. Select Finish now, then save or export the reconciliation report with the statement for your month-end records.
How to handle grouped deposits
A processor or bank may combine several customer payments into one deposit. The clean workflow is to record the individual payments to Undeposited Funds, then create one bank deposit that groups them to the exact net amount shown by the bank. Do not change several paid invoices to match one deposit line.
How to handle outstanding checks or uncleared charges
Leave a legitimate transaction unchecked when it is in QuickBooks but not on the statement. It remains outstanding and can clear in a later period. Deleting it just to make the reconciliation reach zero would make the books incomplete.
What to do when the difference is not zero
Use this order. It moves from reversible checks to accounting changes and prevents one problem from turning into several.
Recheck the statement inputs
Use Edit info to confirm the account, ending date, and ending balance. Watch for a transposed digit or a balance from the wrong statement.
Remove selections that are not on the statement
Filter by date and uncheck pending, future-dated, or otherwise uncleared transactions. Do not delete a legitimate outstanding item.
Find statement items missing from QuickBooks
Look for fees, interest, transfers, debit-card charges, or deposits. Confirm they are not already recorded under another date before adding them.
Check for duplicates and wrong accounts
A downloaded transaction added on top of a manual entry creates a duplicate. A transaction posted to a different bank account cannot be cleared here.
Compare grouped amounts
Tie bank deposits to their payment batches and compare net amounts after processor fees. Use the deposit detail—not guesswork—to explain the difference.
Use the difference amount as a clue, not proof
- A difference equal to one transaction may indicate a missing or incorrectly selected item.
- A difference equal to twice an amount can indicate a duplicate or an item selected on the wrong side.
- A small difference may be a fee, interest, transposed cents, or part of a larger grouped deposit.
These are diagnostic hints only. Confirm the underlying transaction before editing the books.

- 1Statement ending balance — the figure you type in from the bank statement. If this is wrong, everything downstream is wrong.
- 2Cleared balance — what QuickBooks totals from the items you have ticked. This one you do not type; it moves as you tick.
- 3Difference — the finish gate. Investigate why it is not zero; never post an adjustment merely to reach zero.
- 4Beginning balance — must still match the closing balance of the last reconciliation. If it changed, a previously reconciled transaction was edited or deleted.
Fix a wrong beginning balance
If this account has been reconciled before, the current beginning balance should equal the prior reconciliation's ending balance. A mismatch usually means a reconciled transaction was edited, deleted, moved to another account, or changed from reconciled to cleared or uncleared.
- Start from the product alert. Open the alert that says the account is not ready to reconcile and select the link offering help.
- Isolate the changed transaction. Review the reconciliation discrepancy report one transaction at a time.
- Establish what happened. Use the audit history to understand who changed the transaction and what changed.
- Decide the correction. Restore the original transaction only if that reflects the real-world event. Otherwise, ask your accountant how to correct the current period without falsifying history.
- Verify the fix. Return to Reconcile and confirm that the beginning balance now matches the bank statement.
For a first reconciliation, the problem is different: the opening balance may be wrong or dated incorrectly. Compare the opening-balance entry in the account register with the real statement balance on the date you began tracking the account.
Undo a reconciliation mistake safely
Removing a transaction from a completed reconciliation changes the beginning balance of the next period. Use this only when you have confirmed that the specific transaction was reconciled by mistake.
- Open the chart of accounts. Go to All apps → Accounting → Chart of accounts.
- Go to the account. Find the account and open its register or account history.
- Spot the R marker. Locate the transaction. A reconciled transaction displays R in the checkmark column.
- Clear the reconciled mark. Select the checkmark field until it becomes blank, then save and confirm.
- Redo the period. Return to Reconcile and complete the affected period correctly.
Verify that the reconciliation is complete
- The reconciliation difference is exactly $0.00.
- The statement ending date and balance match the bank statement.
- Every statement line has a corresponding recorded event, including fees and interest.
- Outstanding transactions are legitimate and remain uncleared—not deleted.
- The reconciliation report is saved with the source statement.
- The next period opens with the ending balance from this reconciliation.
A zero difference is necessary, but it is not sufficient by itself. A reconciliation can reach zero with the wrong transactions selected. The report should make sense when compared line by line with the statement.
Common questions
Should I create an adjustment to finish?
Not until you have identified why the difference exists. An unexplained adjustment can hide a duplicate, missing transaction, wrong account, or changed historical record. If the difference is real and requires an accounting entry, document the reason and ask your accountant which account and period to use.
Can I reconcile without connecting my bank?
Yes. Reconciliation requires a statement and transactions recorded in QuickBooks; a live bank connection is optional. A connection can reduce manual entry, but you still need to review and reconcile the account.
Why does the bank balance not equal the QuickBooks balance after reconciliation?
The register may contain legitimate outstanding or future transactions that are not on the statement. Reconciliation proves the cleared activity through the statement date, not that every current register item has cleared the bank.
Optional free utilities
Tools that support this workflow
These run in your browser and can help prepare or inspect files. They do not replace reconciliation, source-document review, or an accountant’s approval.
Sources checked
First-party product documentation used to verify the workflow and risk notes in this guide.
- Reconcile an account in QuickBooks OnlineIntuit QuickBooks Support · Checked August 10, 2026
- Fix issues at the end of a reconciliation in QuickBooks OnlineIntuit QuickBooks Support · Checked August 10, 2026
- Fix issues with your beginning balance for previously reconciled accountsIntuit QuickBooks Support · Checked August 10, 2026
- Undo or remove transactions from reconciliations in QuickBooks OnlineIntuit QuickBooks Support · Checked August 10, 2026